Setup RAWeb Webfeed with a Self-Signed Certificate
By connecting to a Webfeed, Windows and mobile clients automatically create shortcuts (in the Start Menu) for every RemoteApp and Remote Desktop Connection that is made available through RAWeb.
A requirement of webfeed is that the web server which hosts RAWeb must be running HTTPS and be secured with an SSL certificate.
This guide shows you how to setup RAWeb Webfeed (using a self-signed certificate) on a HOST computer, and then connect a CLIENT computer to it. Both computers are on the same local network. Steps may vary slightly between operating systems.
In this scenario, the HOST is Windows 8.1 and the CLIENT is Windows 10.
A limitation of using a self-signed certificate is that it must be installed on each client computer before it will be able to connect. If you wish to avoid this limitiation, you must purchase an SSL certificate from a vendor and install it on your server. Installing a purchased SSL certificate is outside the scope of this document.
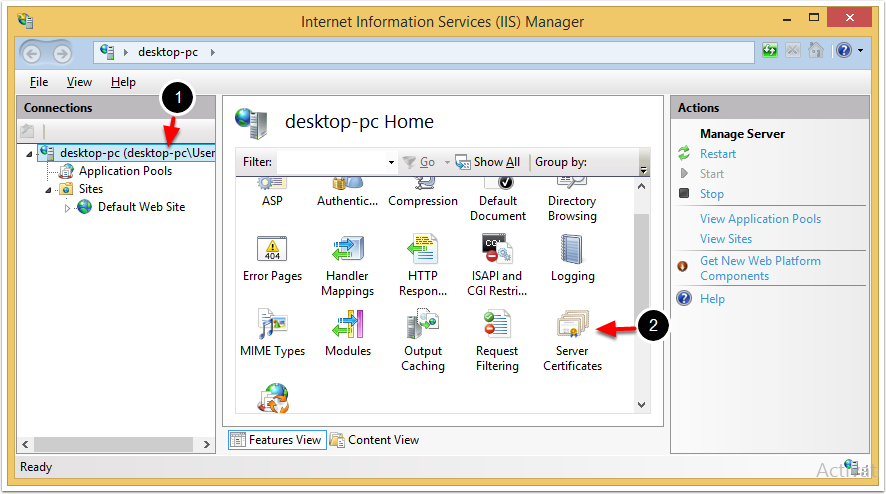
1. Open IIS Manager (HOST)
Windows 7
Control Panel > Administrative Tools > IIS Manager
Windows 8 and 10
Click the Start button and type IIS Manager

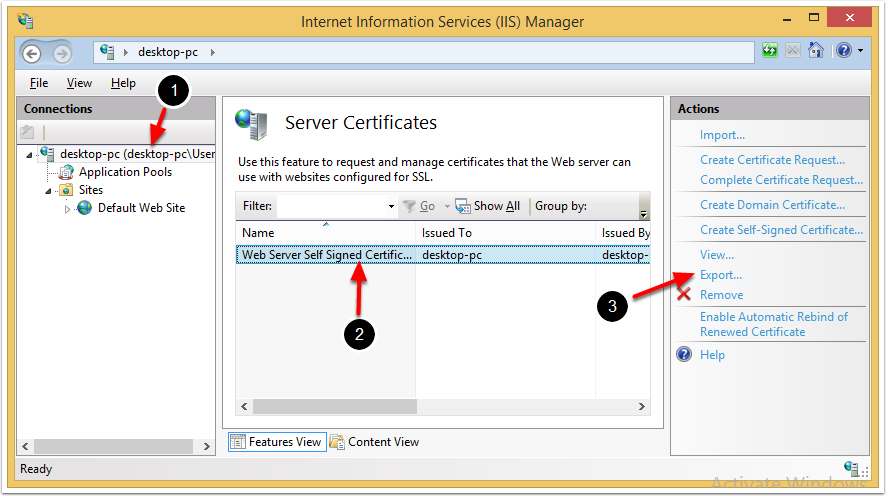
2. Open Server Certificates (HOST)
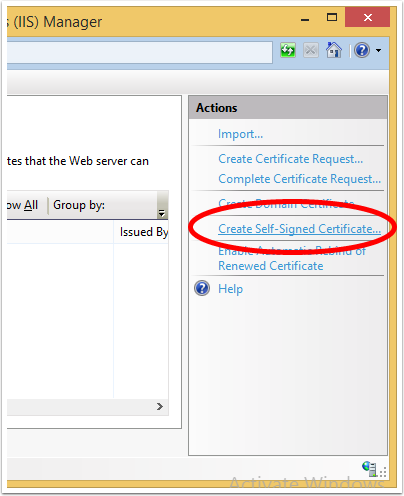
3. Click Create Self-Signed Certificate... (HOST)
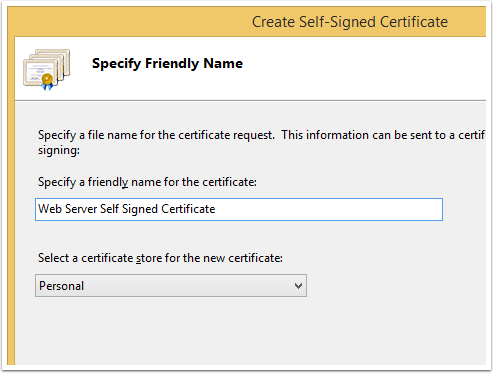
4. Give the certificate a name (HOST)
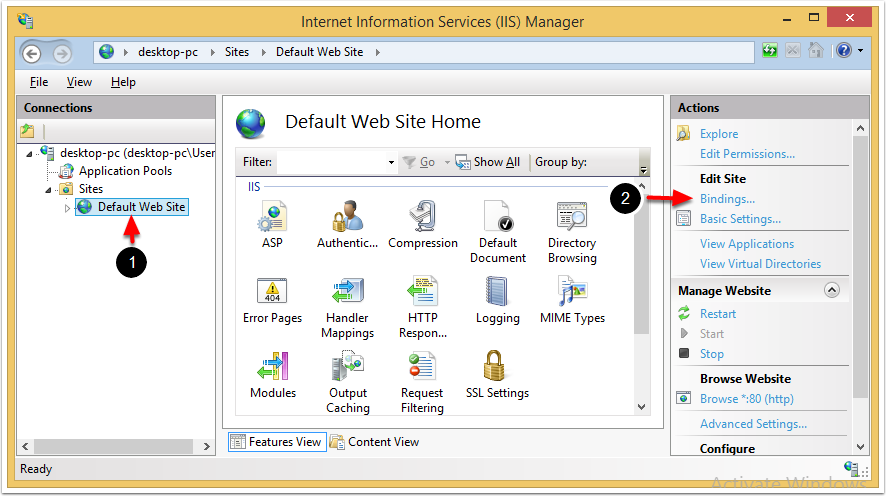
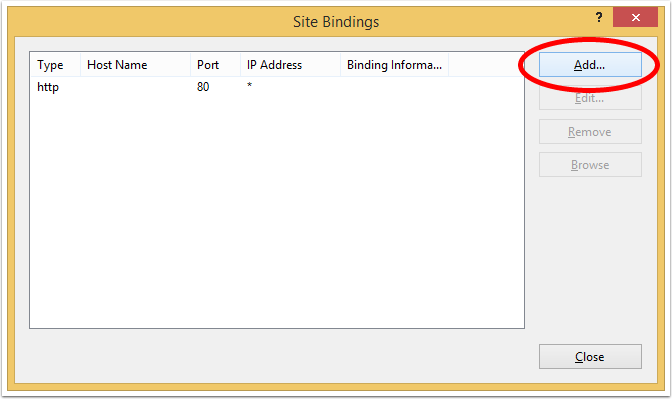
5. Edit the Bindings for the Default Web Site (HOST)
6. Click Add... (HOST)
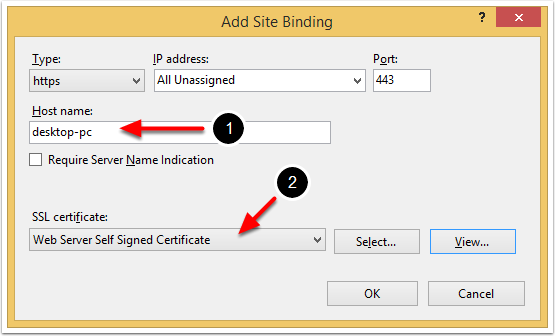
7. Enter the Host name and choose your certificate (HOST)
8. Export your certificate (HOST)
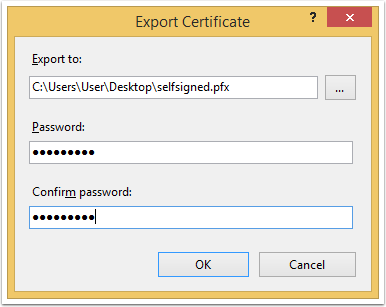
9. Choose where to save the certificate and enter a password (HOST)
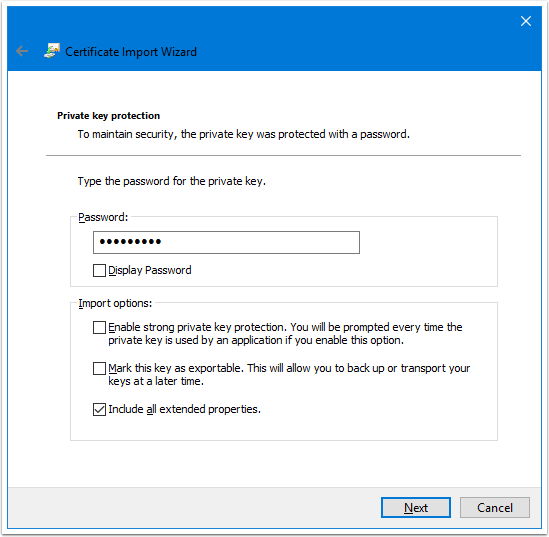
You need to make a password. It will be used later when importing the certificate on a client. Keep it simple.
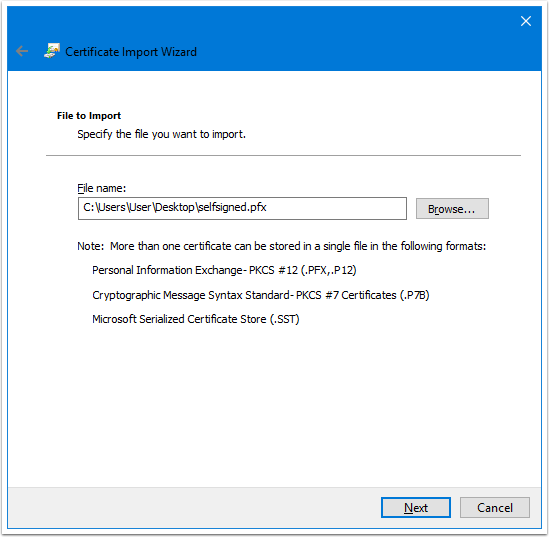
10. Copy the certificate file and open it on a CLIENT

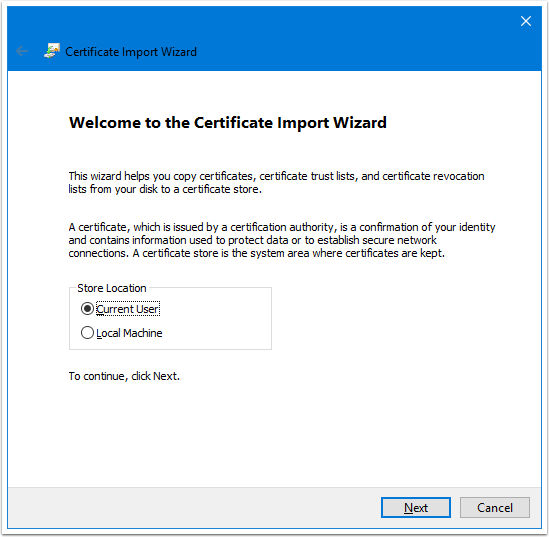
11. Import the certificate file (CLIENT)
Select Current User.
12. Click Next (CLIENT)
13. Enter the password (CLIENT)
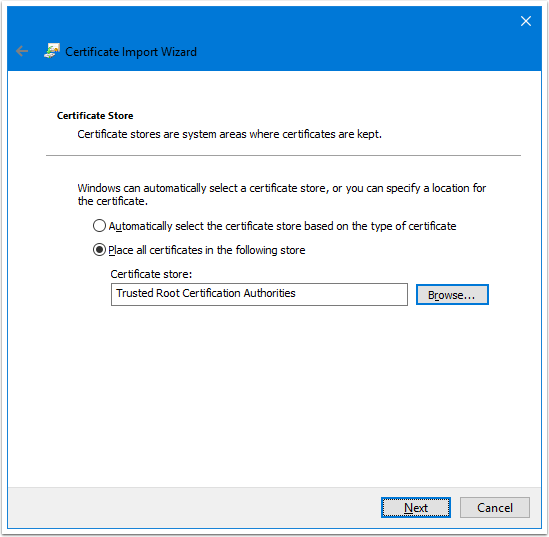
14. Select the correct Certificate Store (CLIENT)
Ensure that Trusted Root Certification Authorities is selected.
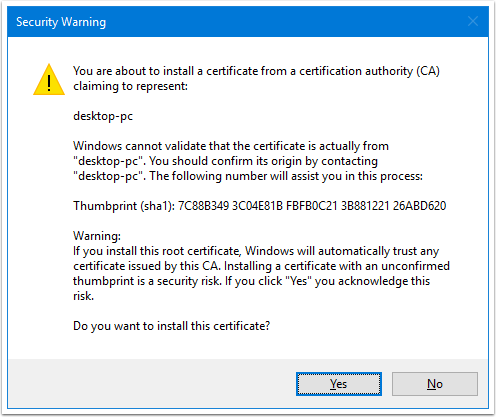
15. Click Yes to confirm warning (CLIENT)
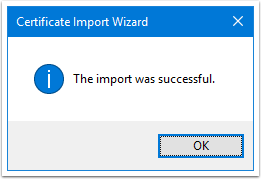
16. Confirm certificate was successfully imported (CLIENT)
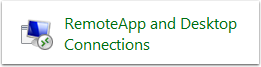
17. Open Control Panel > RemoteApp and Desktop Connections (CLIENT)
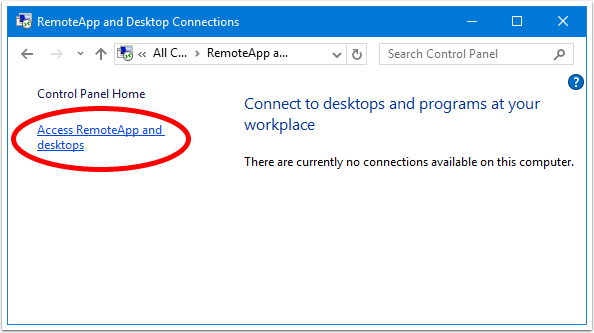
18. Click Access RemoteApp and desktops (CLIENT)
19. Enter the webfeed URL (CLIENT)
This will typically be https://HOSTNAME/webfeed.asp
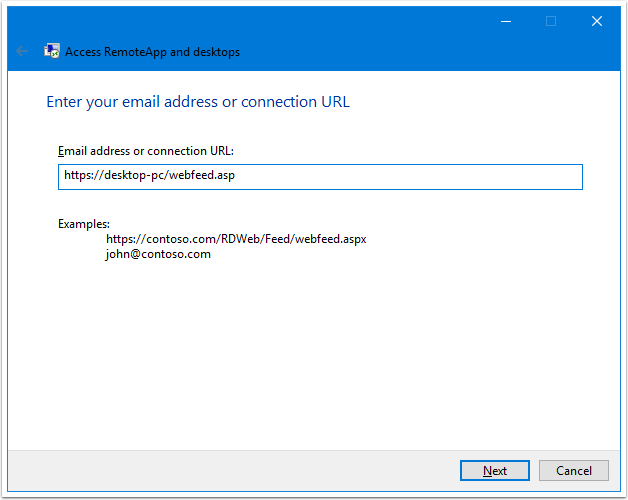
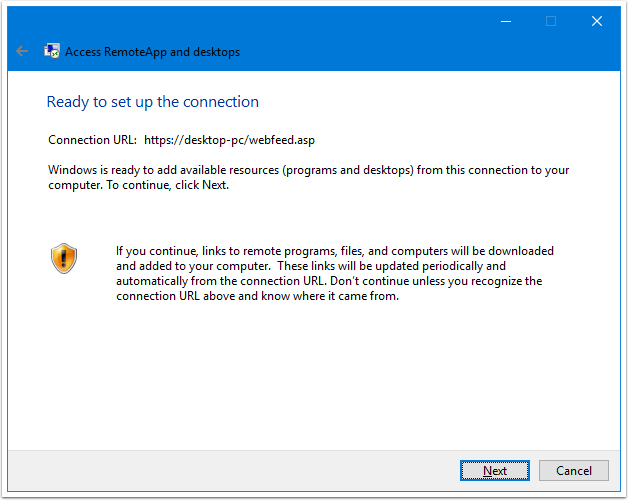
20. Click Next (CLIENT)
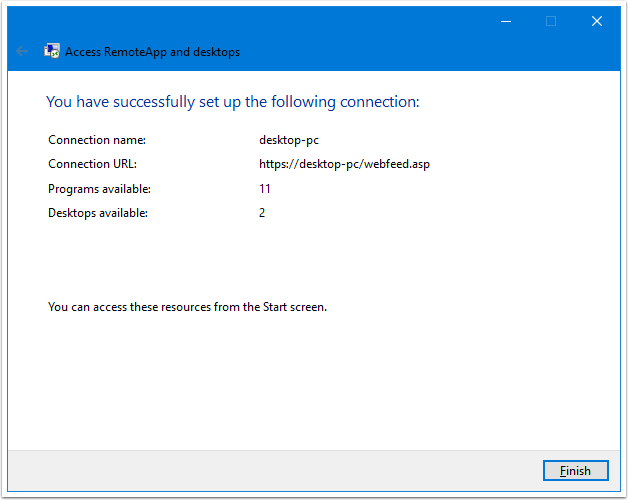
21. Confirm successful connection (CLIENT)
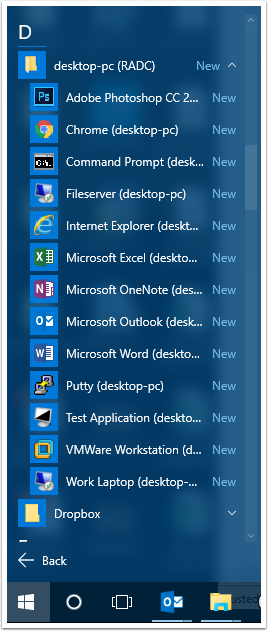
22. RemoteApps and Remote Desktop Connections should now appear in the Start Menu (CLIENT)
As RDP files are added and removed from RAWeb, clients will automatically update these shortcuts.
Notes
If you want a custom icon displayed for an app, put an ICO file into c:\inetpub\wwwroot\icon with the same name as the rdp file eg. Outlook2010.rdp would need an icon called Outlook2010.ico.
Mobile clients require each ico to be a 32x32 PNG. Icons for mobile clients should be placed in c:\inetpub\wwwroot\icon32